前言
我们都知道骰(tou)子有六个面,点数1-6,本文将用C3弹性盒子实现这种骰子布局,具体怎么实现呢,Let’s do it!
整体就从1-6点逐一实现
样式的复用部分可以写在一个类里面,我这里为了看着更清晰,就写的完整一点,先看一下效果图 如下:

先看一下HTML代码 如下:1
2
3
4
5
6
7
8<div class="dice">
<div class="point point1"></div>
<div class="point point2"></div>
<div class="point point3"></div>
<div class="point point4"></div>
<div class="point point5"></div>
<div class="point point6"></div>
</div>
单面1实现
1点是在骰子一面的中心位置,效果图如下:
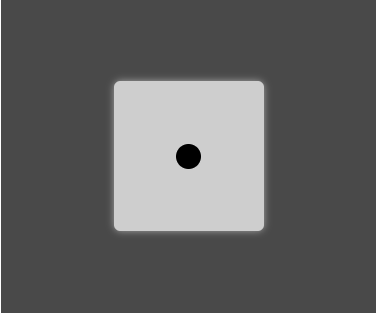
样式代码如下:1
2
3
4
5
6
7
8
9
10
11
12
13
14
15
16.dice{
width: 120px;
height: 120px;
background-color: #cecece;
border-radius: 5px;
box-shadow: 0 0 9px rgba(255, 255, 255, 0.5);
display: flex;
justify-content: center;
align-items: center;
}
.point1{
width: 20px;
height: 20px;
border-radius: 10px;
background-color: #000000;
}
单面2实现
2点是在骰子一面的对角放置,效果图如下:
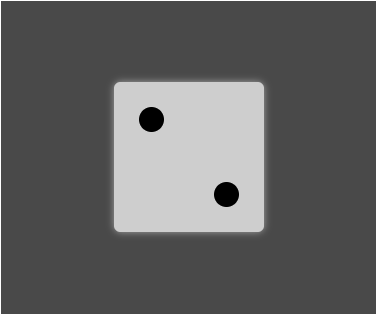
样式代码如下:1
2
3
4
5
6
7
8
9
10
11
12
13
14
15
16
17
18
19
20
21
22
23
24.dice{
width: 120px;
height: 120px;
background-color: #cecece;
border-radius: 5px;
box-shadow: 0 0 9px rgba(255, 255, 255, 0.5);
display: flex;
justify-content: space-between;
}
.point1{
width: 20px;
height: 20px;
border-radius: 10px;
margin: 20px 20px;
background-color: #000000;
}
.point2{
width: 20px;
height: 20px;
border-radius: 10px;
margin: 20px 20px;
background-color: #000000;
align-self: flex-end;
}
单面3实现
3点在骰子一面对角放置,效果图如下:

样式代码如下:1
2
3
4
5
6
7
8
9
10
11
12
13
14
15
16
17
18
19
20
21
22
23
24
25
26
27
28
29
30
31.dice{
width: 120px;
height: 120px;
background-color: #cecece;
border-radius: 5px;
box-shadow: 0 0 9px rgba(255, 255, 255, 0.5);
display: flex;
}
.point1{
width: 20px;
height: 20px;
border-radius: 10px;
margin: 10px;
background-color: #000000;
}
.point2{
width: 20px;
height: 20px;
border-radius: 10px;
margin: 10px;
background-color: #000000;
align-self: center;
}
.point3{
width: 20px;
height: 20px;
border-radius: 10px;
margin: 10px;
background-color: #000000;
align-self: flex-end;
}
单面4实现
4点在骰子一面两行两列放置,效果图如下:
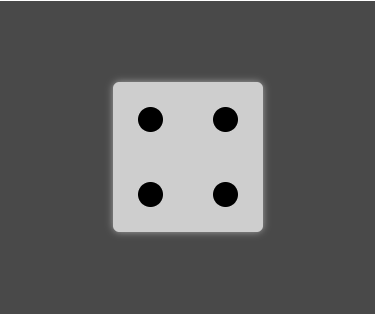
样式代码如下:1
2
3
4
5
6
7
8
9
10
11
12
13
14
15
16
17.dice{
width: 120px;
height: 120px;
background-color: #cecece;
border-radius: 5px;
box-shadow: 0 0 9px rgba(255, 255, 255, 0.5);
display: flex;
justify-content: space-between;
flex-wrap: wrap;
}
.point{
width: 20px;
height: 20px;
border-radius: 10px;
margin: 20px;
background-color: #000000;
}
单面5实现
5点放置是在4点的基础上在中心再加一点,效果图如下:
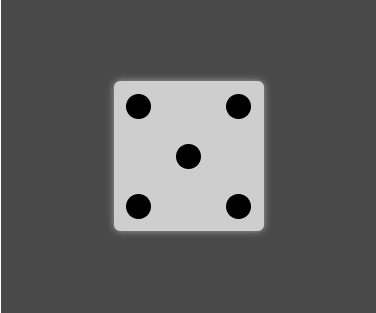
html代码如下:1
2
3
4
5
6
7
8
9
10
11
12
13<div class="dice">
<div class="dice-up">
<div class="point point1"></div>
<div class="point point2"></div>
</div>
<div class="dice-center">
<div class="point point3"></div>
</div>
<div class="dice-down">
<div class="point point4"></div>
<div class="point point5"></div>
</div>
</div>
样式代码如下:1
2
3
4
5
6
7
8
9
10
11
12
13
14
15
16
17
18
19
20
21
22
23.dice{
width: 120px;
height: 120px;
background-color: #cecece;
border-radius: 5px;
box-shadow: 0 0 9px rgba(255, 255, 255, 0.5);
}
.point{
width: 20px;
height: 20px;
border-radius: 10px;
margin: 10px;
background-color: #000000;
}
.dice-up_down{
display: flex;
justify-content: space-between;
}
.dice-center{
display: flex;
justify-content: center;
}
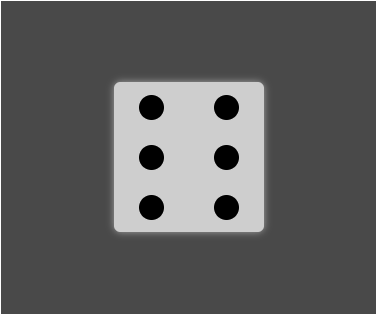
单面6实现
6点在骰子一面三横两列放置,效果图如下:
样式代码如下:1
2
3
4
5
6
7
8
9
10
11
12
13
14
15
16
17.dice{
width: 120px;
height: 120px;
background-color: #cecece;
border-radius: 5px;
box-shadow: 0 0 9px rgba(255, 255, 255, 0.5);
display: flex;
justify-content: space-between;
flex-wrap: wrap;
}
.point{
width: 20px;
height: 20px;
border-radius: 10px;
margin: 10px 20px;
background-color: #000000;
}
总结
C3Flex布局,用着挺舒服的,上文写的骰子这几种排列方式基本上涵盖了Flex常见的应用场景,为了表达的更明了,代码写的比较冗余,具体应用场景可斟酌使用。
注:本文参考 阮一峰 大神的 Flex布局教程:实例篇 有兴趣的小伙伴可以看看。